[목차]
1탄 - 아두이노 세팅 및 코딩
2탄 - 벽 스위치에 교체 설치
3탄 - HomeKit 연동
미루고 미루다가 더 늦기전에 써본다.
============================
자, 이제 홈킷서버를 구성하고, 전등스위치와 통신해야한다.
보통 라즈베리파이로 많이 하지만, 나의 경우엔 블투내장인 PI3 이상이 없기도 했고,
서버로 쓰고 있는 맥북이 있었으니 이걸 사용.
결과적으론
전등 스위치 <-- Bluetooth --> 맥북 <-- HomeKit --> iOS
이런 느낌이 된다.
1. 블루투스 통신 프로그램 제작
https://github.com/iolate/BLEHomeKit
Swift 를 써보고 싶어서 Swift 로 간단한 커맨드라인 툴을 작성하였다.
Swift 를 배우는 삼아 작성한거기도 하고, 대충 짰으며,
SwiftSocket 이라는 오픈소스를 사용하였는데, 이 글을 올릴려고 보니 CocoaPods, git submodule 등의 설정이 전혀 안되어 있어서
그냥 주석으로 퉁쳤다. 알아서 참고만 하자.
사실 이름도 BLEHomeKit 이면 안될 것 같지만 이 역시 바꾸기 귀찮으니 패쓰.
실행이 되면 전등 스위치의 HM-10 과 연결하고, tcp 소켓을 열어서 대기한다.
daemonize 는 귀찮아서 그냥 screen 으로 실행해주는 방식을 취했다.
2. node, npm 설치 (Mac)
Homebrew 가 없다면 먼저 설치해주자.
$ ruby -e "$(curl -fsSL https://raw.githubusercontent.com/Homebrew/install/master/install)"
그 후 node 와 npm 을 설치해준다. brew 의 npm 은 버전이 낮아서(?) 아래와 같이 따로 설치해줬던 것으로 기억.
$ brew install node --without-npm
$ curl -L https://www.npmjs.com/install.sh | sh
node 가 설치된 경로를 환경변수에 넣어준다.
나의 경우 경로는 /usr/local/Cellar/node/7.6.0/bin/ 였으며, ~/.bash_profile 에 넣어주었다.
$ vi ~/.bash_profile
export PATH="/usr/local/Cellar/node/7.6.0/bin:$PATH"
이후 source 를 하든 쉘을 다시 로그인하든 알아서 하자.
3. 의존성 및 HAP-NodeJS 설치
나의 경우 아래와 같이 진행했는데 원래 node 를 안써서 뭔가 이상한 부분이 있을 수 있음.
$ npm install -g node-gyp
$ npm install node-persist debug mdns fast-srp-hap ed25519 buffer-shims curve25519-n ip
HAP-NodeJS 패키지도 npm 에 있는 듯 하지만, 나는 설치가 안되었음.그래서 git 에서 받아서 진행했다.
아마 npm 에서 바로 받으면 위 의존성들도 설치를 해주겠지?
$ git clone https://github.com/KhaosT/HAP-NodeJS.git
$ cd HAP-NodeJS/
$ npm rebuild
4. 액세서리 파일 편집
예시 파일들을 보고 적당히 수정해주면 된다.
나는 아래 접어둔 것과 같이 구성하였다.
이것저것 테스트해보면서 대충 짠거라 코드가 좀 부끄러웠던 것 같지만,
다시 보기도, 수정하기도 귀찮으니 일단 패쓰. 잘 작동하면 됐지...
위 BLEHomeKit 으로 tcp 커넥션이 필요하며 이게 비동기로만 가능한 node 의 조건상, feedback 이 제대로 안 올 수도 있는데,
뭐... 대충 잘 작동한다. ㅋ...
var Accessory = require('../').Accessory;
var Service = require('../').Service;
var Characteristic = require('../').Characteristic;
var uuid = require('../').uuid;
var net = require('net');
var client = new net.Socket();
process.on('uncaughtException', function (err) {
console.log(err);
});
var LightController = {
name: "Light",
pincode: "123-45-678",
username: "XX:XX:XX:XX:XX:XX",
manufacturer: "isho",
power: false, //curent power status
outputLogs: false, //output logs
setPower: function(status) { //set power of accessory
if(this.outputLogs) console.log("Turning the '%s' %s", this.name, status ? "on" : "off");
client.connect(7101, '127.0.0.1', function() {
client.write(status ? 'n' : 'f');
});
this.power = status;
},
getPower: function() { //get power of accessory
if(this.outputLogs) console.log("'%s' is %s.", this.name, this.power ? "on" : "off");
return this.power ? true : false;
},
identify: function() { //identify the accessory
if(this.outputLogs) console.log("Identify the '%s'", this.name);
}
}
var lightUUID = uuid.generate('hap-nodejs:accessories:light' + LightController.name);
var lightAccessory = exports.accessory = new Accessory(LightController.name, lightUUID);
client.on('data', function(data) {
var newPower = 0;
if (data == "n") newPower = 1;
else if (data == "f") newPower == 2;
if (newPower != 0 && (newPower == 1) != LightController.power) {
lightAccessory.getService(Service.Lightbulb).getCharacteristic(Characteristic.On)
.updateValue((newPower == 1));
}
LightController.power = (newPower == 1);
client.destroy();
});
setInterval(function() {
client.connect(7101, '127.0.0.1', function() {
client.write('o');
});
}, 3000);
lightAccessory.username = LightController.username;
lightAccessory.pincode = LightController.pincode;
lightAccessory
.getService(Service.AccessoryInformation)
.setCharacteristic(Characteristic.Manufacturer, LightController.manufacturer);
lightAccessory.on('identify', function(paired, callback) {
LightController.identify();
callback();
});
lightAccessory
.addService(Service.Lightbulb, LightController.name)
.getCharacteristic(Characteristic.On)
.on('set', function(value, callback) {
LightController.setPower(value);
callback();
})
.on('get', function(callback) {
callback(null, LightController.getPower());
});
5. HAP-NodeJS 실행
$ cd /path/to/HAP-NodeJS
$ node Core.js
이렇게 실행해주면 끝!
마찬가지로 daemonize 는 귀찮아서 screen 으로 실행해주면 된다.
6. HomeKit 에 등록 및 사용
등록하는 과정은 귀찮아서 생략. 걍 홈 앱을 열면 알아서 잘 해준다.
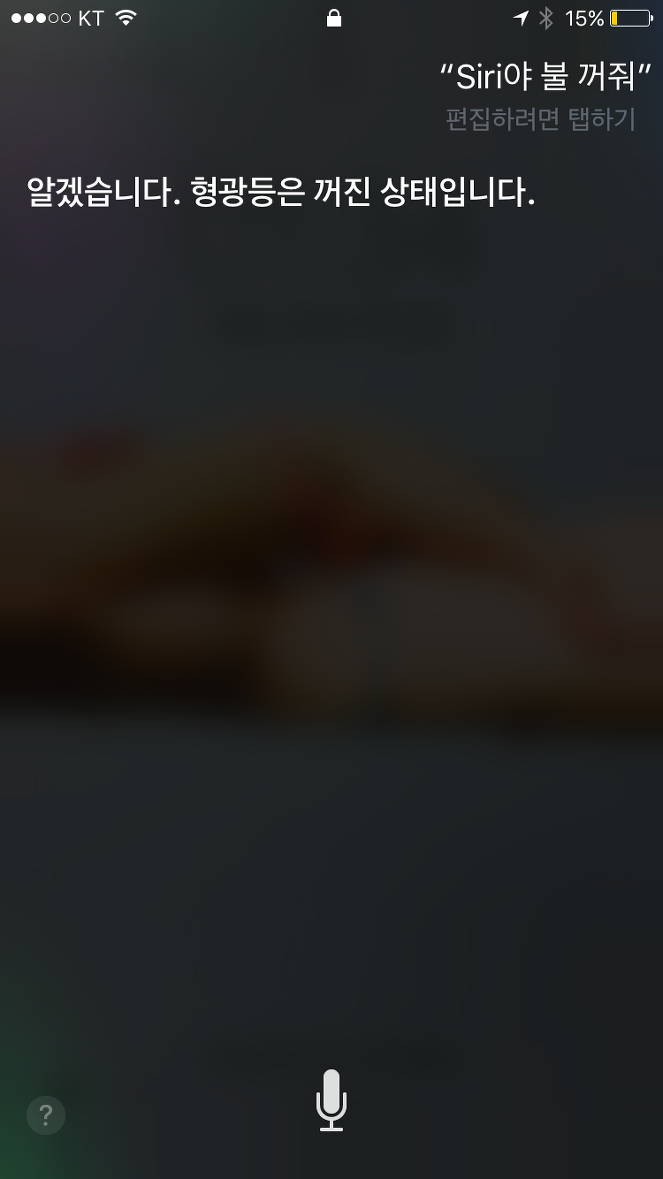
그러면 아래와 같이 컨트롤센터 가장 우측에서 제어를 하거나, 시리로 제어가 가능해진다.


스크린샷에 보이는 에어컨은 아두이노로 에어컨 제어하기 (IR, HomeKit) 1탄 이 글에서... 다루다 말았다. ㅋ
여튼 끝. 개선할 점이 군데군데 많지만 수개월째 매우 만족스럽게 잘 사용하고 있다.

